There are two ways to install the extension.
1. Via admin panel-Extensions-Extensions Store to buy the extension and install it via admin panel.
2. If you purchased the extension via our store, you can upload the extension and install it via admin panel-Extensions-Install Extension-Extension Upload.
Upload the correct extension version and install it via admin panel > Extension > Install Extension > Extension Upload.
For most of the extensions just directly install the extension upgrade without loss of the settings. You do not need to uninstall or delete your existing extension version.
The exceptions to the general rule for specific extensions are listed below:
For upgrading versions of:
1. Telephone Option v1.2.7.4.
2. VAT/Tax Option v1.2.6.4.
3. Advanced Reports v1.2.0.8.
The core/lib/package_manager.php file in some AbanteCart versions must be replaced.Please check the details and find the download here . This should be done PRIOR to install/update of this extension.
For upgrading AbanteCart Core and all versions of Telephone Option Prior to v1.2.7.4, Advanced Reports v1.2.0.8, VAT/Tax ID Option v1.2.6.4:
1. Uninstall the existing extensions.
2. Delete it.
3. Install new version, then setup the settings.
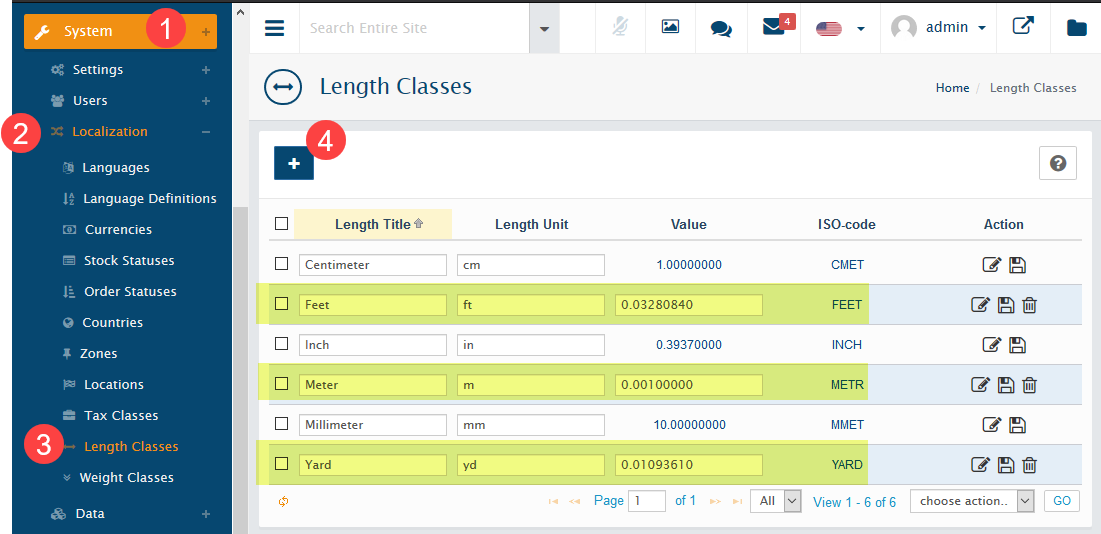
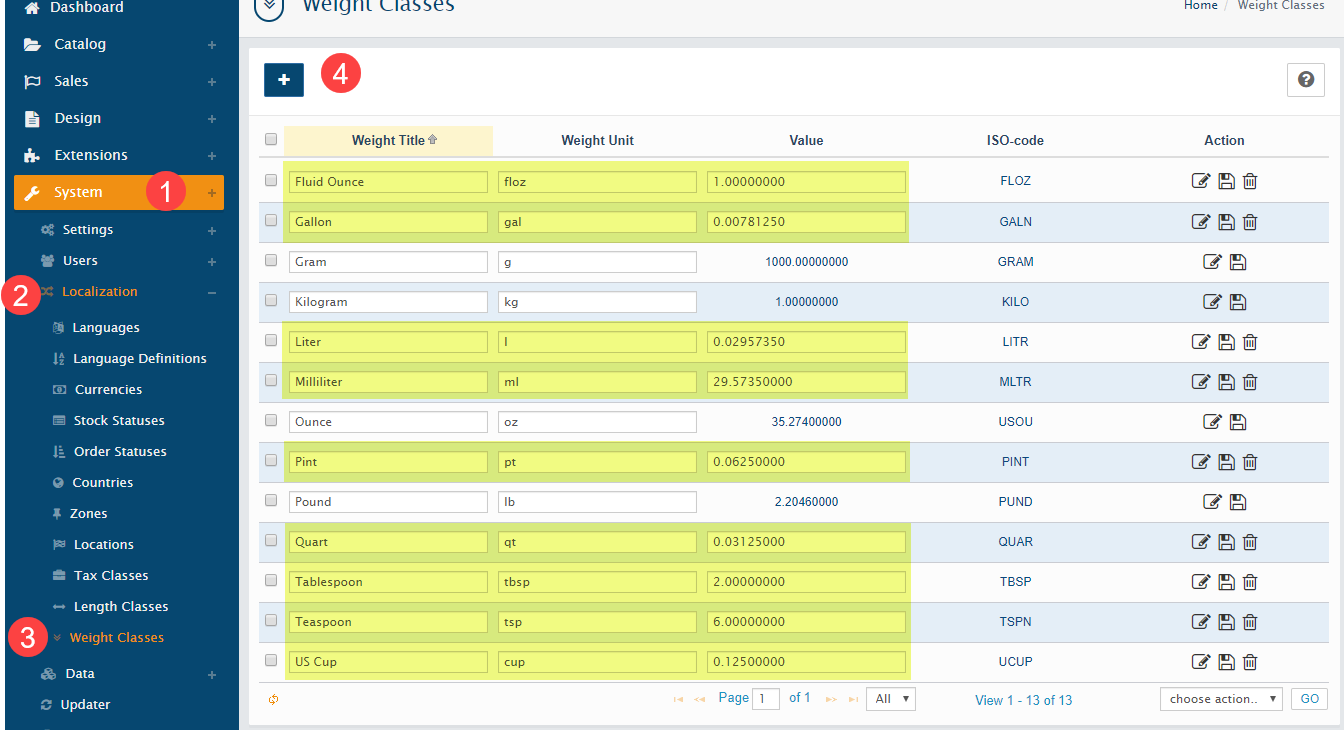
There is a field called Location within our shipper extension. It is used to restrict the shipping locations that was set by you via System -> Localization -> Locations.
Lets say you want to ship to US and UK only. You have to:
1. Create a new location and name it to your desired name (e.g. limited country), then add United States and United Kingdom as the countries that you will ship to from the Location Zones. Please refer to AbanteCart manual about how to create location and edit location zones.
2. Select the limited country (or whatever you named the location) as the location in our shipper location field, save the extension settings.
Our shippers extension will use the dimension that is set in the shippers settings page (by default it’s 5x5x5 if you leave the dimension empty), and only use the calculated product weight by our length calculator extension.
You need to turn ON the Ship Product Individually option within products general tab page in order to have shippers use your specific individual product dimensions. This will be treated as a separate shipping.
Important Notes: Only for Australia Post Integration. Other shippers don’t need to set the sort order.
If you are using our Option Price Lite, Option Price Pro, Option Price Link Pro, Product As Option, Australia Post integration and Pricing calculators, please set the extensions sort/run order according to the following sequence:
1. Option Price Lite, Option Price Pro, Option Price Link Pro: Set to 1.
2. Product As Option: Set to 2.
3. Pricing calculators: Set to 3. If you are using multiple of pricing calculators, you can set all of the sort/run order to 3.
4. Australia Post Integration: Set to 4.
Expanding Your Reach: A Guide to Multi-Language Support in AbanteCart
For any e-commerce business aiming for a global or multilingual customer base, offering a localized shopping experience is paramount. This guide provides a straightforward overview for AbanteCart administrators on how to install, select, and activate new languages for their storefront, enhancing user experience and potentially boosting sales.
The Three-Step Process to a Multilingual Storefront
Transforming your AbanteCart store into a multilingual platform involves a simple, three-step process within the administrative panel. You’ll primarily be working within the ‘Extensions’ and ‘System’ sections of your admin dashboard.
Step 1: Installing a New Language Pack
Before a new language can be used, it must be installed. AbanteCart offers a variety of language packs through its marketplace, many of which are free.
- Navigate to Language Extensions: From your AbanteCart admin panel, go to
Extensions > Languages. This will display a list of currently installed and available language packs. - Find Your Desired Language: You can browse the list for the language you wish to add. If it’s not immediately visible, you can often find more options by clicking on a link to the AbanteCart Marketplace. Language packs can also be found on platforms like GitHub, which can then be uploaded manually.
- Install the Language Pack: For languages listed directly on the
Extensions > Languagespage, you’ll typically see an “Install” or a play button icon. Clicking this will initiate the installation process. If you have downloaded a language pack from the marketplace or another source, you will use the “Upload” functionality on this page to add it to your system.
Upon successful installation, the new language will be added to your system’s list of available languages.
Step 2: Selecting and Configuring the Language
With the language pack installed, the next step is to configure its settings and make it available for the storefront.
- Access Localization Settings: Go to
System > Localization > Languages. This section lists all the languages that have been installed on your AbanteCart installation. - Edit the New Language: Locate the newly installed language in the list. You will see several configuration options:
- Status: This is a crucial toggle. It must be set to “On” for the language to be visible on your storefront.
- Language Name: The name of the language as it will appear to customers (e.g., “Español,” “Français”).
- Code: The ISO 639-1 language code (e.g., ‘es’ for Spanish, ‘fr’ for French).
- Locale: This helps with the proper formatting of dates, times, and numbers.
- Directory: The folder where the language files are located. This is usually set automatically upon installation.
- Sort Order: This determines the order in which the languages appear in the language selection menu on the storefront. A lower number will display higher in the list.
- Save Your Changes: After configuring the settings, be sure to click the “Save” button.
Step 3: Activating the Language for the Storefront
The final and most critical step is to activate the language, making it live for your customers to select.
- Enable the Language Status: In the
System > Localization > Languageslist, ensure the “Status” for your newly added language is toggled to the “On” position. A green “On” button indicates that the language is active. - Verify on the Storefront: Visit your e-commerce store’s front end. You should now see a language switcher, typically in the header of the page, allowing customers to select their preferred language from the ones you have enabled.
By following these three steps, you can effectively break down language barriers, making your AbanteCart store more accessible and user-friendly for a wider international audience. Remember to also translate your product descriptions, categories, and other content for a fully immersive multilingual experience.